Is it a through case hole? If so pushing it in from the outside in leaves the inner hole unchanged and smaller than the outside.
I dunno. Maybe someone can answer that...?


Is it a through case hole? If so pushing it in from the outside in leaves the inner hole unchanged and smaller than the outside.
Well putting JB Weld to block the hole after pushing the BB in would likely keep it from falling anywhere.
No idea, hopefully someone will chime in.Are these tappet blocks cast iron or aluminum? If the former, why wouldn't I just weld up the hole?
No idea, hopefully someone will chime in.
what i do is pull the dowel in the right hand case and then just tap the hole for a grubscrew. the drillway has a plug in the bottom that you can see down there near the oil junction block. pull the plug and you can make sure there are no chips in the oil ways.
if you plug the hole in the crankcase then the pressure cant reach the cylinder base gasket to blow it out.
or you could tap in a BB. i never thought of that. or a single 00 lead buckshot pellet, maybe.
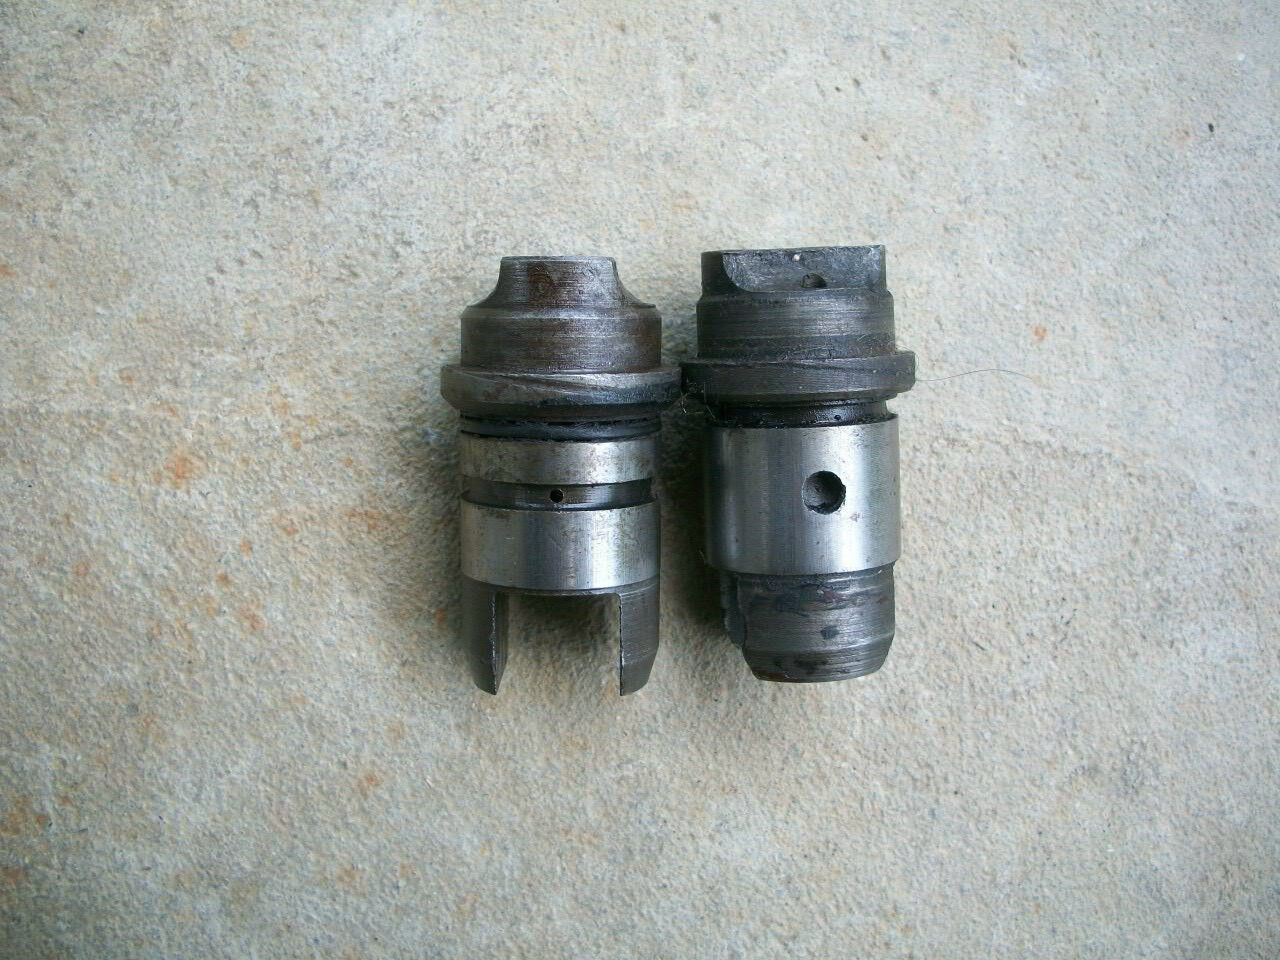
the tappet blocks dont actually have a hole, its an annular ring cut out to match the orifice in the jugs
youd have to tap the BB into the crankcase or the cylindrs
my morgo is not drilled for an oil feed.
i need to save up and buy another. these things are made for a machine that was last marketed over 50 years ago. theyre going to go awy sooner than later
Specifically OEM caliper mounting studs were never 3/8"-16 (UNC) into the slider, they were always 3/8"-20 (BSF). Possibly UNC was too coarse for the length of thread in the slider?One change he suggested that I do like is removing the OEM caliper studs and using button head stainless 3/8-16 allen screws to affix the adapter to the fork slider
Specifically OEM caliper mounting studs were never 3/8"-16 (UNC) into the slider, they were always 3/8"-20 (BSF). Possibly UNC was too coarse for the length of thread in the slider?
Button head stainless allen screws possibly not available with 3/8"-20 thread ... probably easier is what the Co-op did when they fitted twin discs - so the wheel could be fitted and removed, right hand sliders were helicoiled 3/8"-24, bolts used to mount the right hand caliper. My T160, when I added a second front disc, I had the left hand slider helicoiled 3/8"-24 also - any wheel easier to fit with all calipers unbolted.
Not strictly speaking ... if you look in your bike's workshop manual, page GD9 says the stanchion diameter is 1.3605" to 1.3610"; otoh, if you look in the 63-70 workshop manual, page GD8/pdf page 21 says the stanchion diameter is 1.3025" to 1.3030" ...stanchion O.D. the same going back for '70 and any other earlier models?

71, 72 and early 73 twins with drum front brakes, the stanchion centres are 6-3/4", same as 69/70 stanchion centres. Pre 69 centres are 6-1/2".triple clamp/stanchion spacing the same for pre '71-'72 models
Probably not completely impossible to make work but the gain would never be worth the pain ...'73-and-later sliders I'm using compatible with stanchions on bikes earlier than '71-'72 models?
Not strictly speaking ... if you look in your bike's workshop manual, page GD9 says the stanchion diameter is 1.3605" to 1.3610"; otoh, if you look in the 63-70 workshop manual, page GD8/pdf page 21 says the stanchion diameter is 1.3025" to 1.3030" ...
Otoh, I happen to know pre 71 97-1500 seals fit in 71 on sliders, work on 71 on stanchions ...
71, 72 and early 73 twins with drum front brakes, the stanchion centres are 6-3/4", same as 69/70 stanchion centres. Pre 69 centres are 6-1/2".
Probably not completely impossible to make work but the gain would never be worth the pain ...
If you take a look at, say, the 70 650 parts book forks pages (pdf pages 54/55), you will see the forks are completely different from those fitted 71 on to triples and oif twins. The usual front end change to pre 71 twins (and 71-74 500s that continued to be fitted with the same forks and drum brake) is complete disc brake forks; if a T150 disc brake bottom yoke is used, the forks bolt on.
73 on disc brake sliders can be connected to 71/72/73 drum brake stanchions only because the thread in the bottom of the damper rods is the same and the damper-rod components are similar. Apart from that and seals, no major component is interchangeable between 73 on disc brake forks and 71/72/73 drum brake forks.
