Restoring & Modifying 1971 OIF TR120

Triumph Motorcycle Forum - TriumphTalk

Help Support Triumph Motorcycle Forum:

This site may earn a commission from merchant affiliate links, including eBay, Amazon, and others.
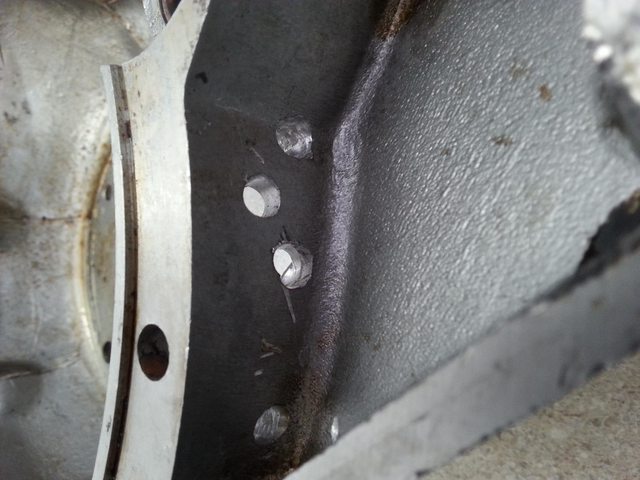
Just to keep and share some measurements I've taken, as it's critical to get the hub centered before machining a prototype adapter--and for a while this morning I was a little worried:
  • the .75" I.D. x 1.250" O.D. x .1450" thick spacer that came on the 2000 Sporty front end I've got laying around nets roughly .0650" clearance shown in Mock-up(2) in the above post, and .1215" in Mock-up(3) - plenty of room, since .063" = 1/16"
  • it's difficult to measure the R/H gap conventionally as the slider gets in the way, but with the 1450" Harley spacer inserted on the rotor side and sliding the hub along the axle until it contacts the R/H slider nets travel of .00915~.0103". I'll not fret about the .00115" variance in my measurements and call it .010" of lateral freeplay or gap on the R/H side
However, although we have enough room in Mock-up(3) for centering, I need to increase the more critical clearance in Mock-up(2) by switching to these McMaster Carr ultra-low profile stainless allen screws (see pic). The heads are .109" as opposed to .166" for a typical button head like I'm using now.

That'd gain .057" of clearance--and we'd gain an extra .0475" by ditching the washers. Easily done by using grease on the undersides of the heads to facilitate secure torquing, and blue loctite on the threads to retain the screws.

The only add-on task is they require end-users to re-drill the rotor's bolt holes to .375" to accept the .109" shoulder. Easy-peasy if you have a drill press or hand drill and vise (or even a C-clamp and table edge or board to stand on), and a little motor oil to lubricate your bit.

With the added clearance, our solution is enabled (but someone please check my math, as I'm getting tired):
  • shift the hub .0625" toward the L/H side, which increases the R/H gap to .0725", while leaving .059" in Mock-up(3) and now .692 in Mock-up(2). Mock-up(3) becomes our critical tolerance, which is acceptable since .063" = 1/16"
  • .0725" subtracted from .1450" on the L/H side = .0725", or hub @ dead center
So: I'll order some shims and the low-profile screws, and when they come in, proceed with the adapter mock-up.
 

Attachments

  • 91223A225_316 Stainless Steel Ultra-Low-Profile Socket Head ScrewM.jpeg
    91223A225_316 Stainless Steel Ultra-Low-Profile Socket Head ScrewM.jpeg
    24.2 KB · Views: 14
The caliper arrived, and the ultra-low profile fasteners from McMaster Carr should be here tomorrow.

On the design front, what I am now thinking about doing is a single-step piece, rather than a double-step part like my rear disc caliper adapters for the MG/Austin Healy Spridgets. That would not only arguably be stronger but also really clean-looking... let me explain.

So, first is a shot of the existing two-pot 'big brake' kit sold for '73 and later bikes. Note that the fasteners are all exposed, of necessity due to the flat design of the adapter. In the part I'm contemplating, I could replace the OEM caliper studs with shorter ARP high-tensile versions (2nd pic), and have the stainless nylock nuts contained within a countersink well that receives a stainless press-in cap--both for looks and to keep out moisture and salt. (These ARP fasteners, amazingly, are less than 50% the cost of the OEM items, as bought in a pair at The Bonneville Shop, anyway.)

Then, I could simply tap the part's inboard surface @ the caliper ears' holes to receive 3/8" stainless button head allen screws, affixed with blue loctite. I like that approach, as there'd be no exposed threads to corrode, and the caliper ear-to-rotor clearance is maximized--though not problematic even with studs and nuts. The part has to be two-sided, and thus two set ups anyway, so it's a negligible added cost to drill and tap two holes, as the big CNC mill can hold a dozen or so tools at once.

So, your R&R procedure would be: remove wheel>pop out caps and unbolt adapter with caliper attached>unbolt and service caliper>reverse procedure to install. (Because I'm using a L/H caliper for more direct/clean hose routing, the bleeder is faced down, so you simply bleed the caliper before installing--though one could buy the R/H version if wanting to bleed in place and simply have a longer hose.)

If this configuration works out, when you looked at the conversion side-on, similar to the first photo, all you'd see would be a clean, flat surface (either anodized or polished) shaped roughly like the blue outline in the 3rd pic (from the old mock-up), but with stainless caps on the countersinks where the OEM or shorter ARP caliper studs and nuts reside. Also, I could think about machining a relief (or two) into the part to reduce its weight--though it wouldn't be very heavy at all. It would take the machine just a few minutes to cut and add radii to the relief, so again not very expensive.

Now, if I did not countersink to cover the OEM studs and their nuts, the part could all be machined from one side, which would reduce the cost of a second set up--so, perhaps roughly covering the cost of anodization per part. My own prototype will likely have the countersinks if I can make that work because I think it's neat. If there are no reliefs, it'd be duck soup for people to polish and clear coat this part, so not sure I'd want to incur the added cost of anodizing...?

Well, anyway, we'll see shortly if this will pan out.

Oh, and by the way - I will weigh the front end again with the later-model sliders and the adapter attached, to get an accurate comparison with the OEM '71-'72 version. Can't compare the 'built wheel' weights until we see if this is going to pan out, and I lace up the aluminum rim, stainless spokes, and Sporty hub and stainless 11.5" rotor...
 

Attachments

  • existing-big-brake.jpeg
    existing-big-brake.jpeg
    266.5 KB · Views: 14
  • ARP AJ1.000-5B Stud.png
    ARP AJ1.000-5B Stud.png
    813.3 KB · Views: 12
  • IMG_2644.jpeg
    IMG_2644.jpeg
    143.3 KB · Views: 10
Last edited:
Okay! Got the 2D template made up from cardboard, so the first pic shows--with or without a weight-reduction scallop between the caliper's bolts--roughly what the part's outboard profile would look like.

With one exception: I've got a couple of bolts slid into the caliper to check the pad's radial alignment (see below discussion), but the actual part would have studs insert from the inboard side, so you wouldn't see any fasteners there.

The second pic shows that with the caliper's 'crotch' (the apex of the angle between its mounting ears) resting on the lower slider's stud ear, the pads are j-u-s-t past the outer edge bevel of the rotor and onto the bedding surface. This has the following design ramifications:

First, allowing for some variance in the shape of these castings, I could leave it right where it is and not require people doing this conversion to sand the O.D. of the boss unless needed to fit the adapter (with caliper fitted) onto the OEM caliper studs--and in so doing, move the pads onto the bedding surface.

Alternatively, I could shift the caliper's mounting holes inward (in a radial dimension), and require all people to sand the boss. My predilection is the first route--and in my case, I'd likely sand the boss just slightly to create a few thousandths clearance as a matter of course.

The third pic shows that there's ample room to shift the pad inward in a radial dimension--and both the 2nd and 3rd pics demonstrate that (after some fiddling and luck--I hit it the first time I drilled the holes in the cardboard) the caliper is aligned properly vis-a-vis the rotor's radius. This dimension is actually fairly forgiving from a designer's standpoint: you can rock the caliper a smidge and not contact the rotor's outer edge. But I like to get it so close that I can't discern any misalignment with the naked eye--and of course an adjustment could be made from the working prototype in the machine's routines if needed.

Regardless, it got too cold to work any more--and I need the axle shims before I can complete the inboard/outboard dimension of the part, too. So that's it for today.

What I can tell you is that this conversion is almost certainly viable from a single piece of 6061-T6 aluminum. It appears to be only a question of the part's outward-facing profile, re: whether I can indeed hide the nuts affixing the adapter to the OEM studs (less likely now that I've had the caliper closer to its actual position in 3D space), and some calculations to satisfy myself about the design's strength.

But right now, there's only one portion of the emerging part that concerns me from a strength standpoint--and not very much. If I had to guess, I'd speculate that we'll end up with a part that has exposed fasteners on the OEM caliper studs (to maintain my preferred design minimum thickness of 10mm), and the 'blind' ARP studs mentioned earlier affixing the caliper to the adapter--both for aesthetics and to prevent corrosion on those threads.

We'll see what happens when I attack the third dimension later in the week. It took me a fair amount of head-scratching to come up with the Eaton M45 supercharger manifold shown in the 4th pic, which had to balance fastener, rigidity, flow rate and snorkel sealing, and T-bar clamp fitment and machining cost considerations. So, maybe I can come up with a creative solution that still allows for all 4 fasteners to be hidden--but if I had to bet, I'd say 2 hidden, 2 exposed is where we'll come down.

Regardless, it'll be a neato DIY conversion.
 

Attachments

  • 2D template(1).jpeg
    2D template(1).jpeg
    278.1 KB · Views: 21
  • 2D template(2).jpeg
    2D template(2).jpeg
    127.9 KB · Views: 12
  • 2D template(3).jpeg
    2D template(3).jpeg
    199.5 KB · Views: 8
  • Creative Spridgets Supercharger Adapter copy.jpg
    Creative Spridgets Supercharger Adapter copy.jpg
    160.8 KB · Views: 10
Last edited:
Impressive build

Thanks very much. I'm hoping Kyle Jones is successful with the 46-tooth chain ring endeavor, in which case I'd look forward to ultimately having a long-legged 750 Bonneville with a front brake to handle the increase speed--and with the much lighter weight, a more nimble feel in the corners than the modern offerings.
 
So, the shims came in and... either my math or my somewhat wonky method of measuring lateral movement of the hub was wrong. I only needed .096" of shims per side, which left ~ .005" of end play. Easy to take up with the .001" shims, but they're so flimsy and that amount of end play is so negligible that for our purposes (and maybe even for riding), I don't care. It's way easier to work with the single .060" and three .012" shims I ended up using on each side.

The first pic shows that the clearance remains adequate to stick with the cheaper stainless button head allen screws--so no rotor re-drilling required, and the nifty, ultra-low profile guys in the last pic aren't necessary (but they are neat, so I might just...). There's still scads of clearance for the rotor with the hub centered. It's not even close to the fork slider, as shown in the 2nd pic.

Unlike the dead-simple design of the flat adapter for the commercially available 'big brake' kit, which merely moves the caliper out in a radial dimension, we've got the deceptively difficult task of designing a 'stepped' design. The 3rd and 4th pics help me visualize the part's critical area--which is the rough equivalent of a cantilever (though not quite the same)--by essentially slicing the part into two layers.

So, these photos show what is either the top or bottom layer of the design--depending on whether I want to have the mounting lugs extend beneath or above the caliper's 'ears.'

Going with a sleeker-looking undergirded part puts the mass of the step toward the rotor--in which case, we'd use the ARP studs discussed earlier, and have four exposed fasteners. But it's impossible to achieve as beefy of a step (the visible profile of the part would end up being a little different, too).

Anyhow, I've got to make up another 1st layer for the sleeker, undergirded design, then make both 2nd layers, laminate the respective parts, and discuss the feasibility of machining both versions with the shop.

Really, I think the less-beefy undergirded part might be fine, because with the nested design of the first layer--which exists in either case--much of the radial force that would normally be transformed 100% into shear onto the caliper bolts is transferred into that alcove you see at the top of the part, which effectively acts as a stop. It's really secure, so I don't think the lower bolt would experience much load at all--and therefore very little chance of the stud tearing out or the lug failing.

But we'll see what the machinist says...
 

Attachments

  • 3.jpeg
    3.jpeg
    95.3 KB · Views: 13
  • 5.jpg
    5.jpg
    257.4 KB · Views: 18
  • 4.jpg
    4.jpg
    156.4 KB · Views: 13
  • 1.jpeg
    1.jpeg
    227.8 KB · Views: 9
  • 2.jpeg
    2.jpeg
    129 KB · Views: 12
Last edited:
So, I got the layer templates made up, milled some wood to around .40", and transferred the design(s) onto the wood. This weekend, I'll do the laborious work of cutting out the shapes with the band saw and sanding the profiles of the lugs that mate with the caliper's 'ears.' There isn't much room for aluminum around the 3/8" (10mm) bolt holes, so it'll be slow going...

Meanwhile on the aluminum wheels:

I found this cool video by Devon Racing on building a conical hub wheel. I merely had to true and balance the wheels on my '51 FL, and was thinking of having Buchanan's build these wheels. But it's around $100 per wheel I'd save if I do it myself, and this guy makes it look straightforward--plus, he's lacing a more complicated conical hub wheel: my front hub, anyway, is a symmetrical Sporty hub, with dead-center (zero) offset.

So, I may just DIY the wheel-building, as the savings will pay for the racing con rods I bought per another thread.
 
All rightee then...

I finished the tool-and-die work, and it turns out (to my pleasant surprise) that the 'undergirded' vs. 'overhanging' design yields a beefier cross-section at the critical portion of the 'step'--or where the two layers overlap. So, the finished part will look roughly like image #4 in Post no. 166--very sleek and minimal.

There will be two nylock nuts (or a person could use acorn nuts with lock washers and blue loctite for aesthetic reasons) holding the adapter on the OEM studs, and two stainless button head allen screws affixing the caliper to the adapter. Very clean installation.

The mock-up came out very nicely: the pads sit a few thousandths inboard of the edge of the bevel on the rotor's bedding surface outer perimeter, and the caliper sits dead-center over the rotor's thickness in an inboard-outboard dimension (i.e., L/R along the axle's longitudinal axis).

This means that the only mod someone performing this DIY conversion might have to do--and that's only if their casting varied slightly from mine--is kiss the O.D. of the lower caliper bolt lug on the late slider with a Dremel sanding drum (or do it by hand), so as to bring the pads a few thousandths onto the rotor's bedding surface.

As I type this post, the mock-up prototype to inform the machinist's CAAD drawing and CNC routines is laminated and the glue is setting up. I will meet with him as soon as he's got a time slot to make up the working prototype from 6061-T6 aluminum, and then per the last post, will order up the Borrani aluminum rims and spoke kits from Buchanan's.

I'll then futz with the master cylinder and plumb the braided hose, rewire the L/H OEM control's momentary buttons to operate both the horn and Hi/Low beam relay, and move on to rebuilding the swing arm and lacing up the Borrani rear wheel.
 
Cool stuff you're doing TUP

Thanks, Rocky.

I'm excited because while this conversion is similar to the one I did for my '51 FL, the latter was a one-off job: you have to be (or have access to) a competent machinist to replicate its several fabrication operations, so I really didn't help others out very much.

However, this single (or double) 11.5" front disc conversion for '71-'72 Triumphs (and OIF BSAs?) is readily done by anyone with average mechanic's skills, save for having a Harley axle turned/cut to length (definitely a minimum shop charge) and lacing up a wheel:
  1. Remove wheel, brake cable, and fork sliders;
  2. Purchase '73-and-later sliders and install on fork tubes;
  3. Purchase a used or new '96-'03 Harley Sportster hub (they come either one or two-sided, aftermarket are typically the latter--but both will work for a single-disc bike, as their dimensions are the same);
  4. Remove your spokes or buy a new set, and lace up the Sporty hub centered--or have that done by a wheel smith (~$100);
  5. Purchase the 11.5" Harley-spec rotor of your choice and bolt it onto the hub using 5/16-18 x 1" button head socket cap screws;
  6. Have a suitable 3/4" axle turned and parted off to fit (i.e., Harley part no. 43346-83B, V-Twin Mfg. 32-239, etc.);
  7. Install .096~.098" of shims on either side of the hub and install axle on fork sliders;
  8. Purchase caliper adapter and bolt to caliper w/blue loctite;
  9. Bolt caliper adapter with caliper to fork slider with OEM lock nuts;
  10. Install master cylinder of your choice (mine, which reasonably mirrors stock lever shape and finish, was ~$20, discussed earlier);
  11. Install brake hose of your choice and bleed brakes;
  12. Bed in the pads.
Voila - DIY 11.5" front disc brake. For duals, you'd just need two L/H sliders, per the earlier discussion and photo of the vintage Aisle of Mann bike, a two-sided Sporty hub, and 2x adapters... but you'd be doing front wheel stands IMHO. Unless one is a racer or rides insanely fast like Speedrattle, Bloodknot, et al., hardly necessary.

Hmmm... come to think of it, one could easily do this with a '73-and-later Meriden bike by dishing the wheel when lacing it to move the hub toward the L/H side, then buy a wider R/H 3/4" spacer, which come in all kinds of thickness for Harleys on eBay, aluminum or steel, as you wish. If one couldn't dish the wheel sufficiently with stock spoke kits sold by Buchanan, et al., then it'd be duck soup to have a spacer ring turned to move the rotor a touch more over to meet the caliper.
 
Last edited:
I got a PM that I wanted to respond to here. The answer is 'Yes,' as to both questions:

First
- I will weigh my unlaced OEM steel rim and compare it to the unlaced Borani aluminum rim before lacing up the new built wheel for an unsprung weight comparison. The sender noted that many, if not most people who tried this DIY conversion would retain their OEM steel rim to save money or just to keep the same aesthetic. I guess I could compare the spokes, but I'll be using stainless spokes, so I assume it'll be basically a wash...?

Although not asked, I suppose I could also compare the Dunlop K70s to the Bridgestone Battlax tires in the identical sizes--as presumably some people would retain the OEM tires.

Second - to be fair to the OEM drum setup, I will add the caliper and adapter to the built wheel's weight--because the equivalent mechanism is contained in the conical hub/TLS setup, obviously. As mentioned earlier, the OEM built (front) wheel with axle and inflated Dunlop K70 tire is almost exactly 31 lbs.

I don't know how this will come out in a fair comparison, but it'll be interesting--though a small increase in unsprung weight will be worth it to me in exchange for what I assume will be a dramatic improvement in braking force, fade resistance, and modulation.

That said, I won't be able to do a braking distance comparison because of the order in which I ended up doing the restoration and mods. Therefore, it would be helpful if someone could road test their OIF '71 or '72 bike and provide some 'hard stop' distances--say, from 60 mph on dry, level blacktop, as that's where I'll be testing this setup. Best would be several, successive efforts. (Please be very careful.)
 
While waiting to meet with the machinist re: the caliper adapter, I pulled the Boyer Bransden ignition and timing cover to inspect the oil pump and timing gears. The gears look amazingly nice--no discernible wear, no sludge in there at all.

The oil pump plungers have some superficial marks on them--save for that little notch... But anyway the tolerances are very tight; they do not wiggle at all in the bores. The sliding drive block, however, is worn enough to replace: a whopping $11.00. I'll R&R the balls and springs, too, as they're extremely inexpensive.

The timing cover has some pretty good gouges in it, as you can see. So, it'll have to do what I did with the '51 FL's timing and valve covers: start with coarse sandpaper and walk all the way up to 2,000 before hitting the buffer wheel. I'll try to bang that out before the innards get here--then it'll be on to the kicker cover, which is in similar shape.

I've attached the 'before and after' photos from the '51 FL (for folks who notice, those are '66 Shovel heads on my Panhead)... it was a lot of elbow grease to get rid of that damage, but worth it, I think. I'm guessing these Bonny bits will come out nicely too.

The side covers are easy to reach and redress with simichrome. But I'm thinking that if I decide to buff the aluminum Sporty hub and Borrani rims, since it's hard to get in between the spokes to re-polish periodically, I may apply a good quality, fuel resistant clear coat.

Oh, last shot is the air cooled VW Beetle headlight relay I used on the FL and installed on this bike--which is entirely hidden by the fuel tank. It's neat because it allows use of a single momentary button to control the Hi/Low beam.

So, when I ditch the R/H control pod to mount the master cylinder for the front disc brake setup, I can just rewire the second momentary button on the L/H pod to control the horn. I already have the other activating the Hi/Low beam via this relay.
 

Attachments

  • Oil pump(2).jpg
    Oil pump(2).jpg
    212.7 KB · Views: 10
  • both covers after.jpg
    both covers after.jpg
    193.9 KB · Views: 22
  • before.jpeg
    before.jpeg
    261.2 KB · Views: 24
  • timing cover(5).jpg
    timing cover(5).jpg
    138.2 KB · Views: 8
  • timing cover(4).jpg
    timing cover(4).jpg
    153.9 KB · Views: 9
  • timing cover(3).jpeg
    timing cover(3).jpeg
    249.3 KB · Views: 8
  • Oil pump(1).jpg
    Oil pump(1).jpg
    238.1 KB · Views: 15
  • timing cover(2).jpeg
    timing cover(2).jpeg
    362.9 KB · Views: 10
  • timing cover(1).jpeg
    timing cover(1).jpeg
    427.5 KB · Views: 17
  • headlight relay.jpg
    headlight relay.jpg
    260.1 KB · Views: 12
Last edited:
For those of you who haven't tried this, here's a few shots of the first day's work: 100 grit (dry) to get out the big divots and gouges (1st pic), followed by 150 (dry) to reduce the deep sanding scratches and restore the original radii, then 220 and 320 (dry) to continue reducing scratches and establish a scuff base on the entire cover.

The second photo shows a close-up of the excavation of what I had thought was a missing rivet--but in fact the PO had busted it off flush with the cover. Swap the collet to the smallest in the Dremel, use the teensy ball bit to make a trough small enough to be hidden by the patent badge, then use a fine punch (an ice pick or leather punch will work) to dig it deeper immediately adjacent to the rivet, so you can grab what's left with a pair of needle nose, twist and pull... and out it comes.

Looks like there's enough of the original hole to grab a rivet--but if not, I'll just slip a toothpick in there, add some JB Weld, pull the toothpick when it starts to kick, sand it smooth the next day, drill to the right I.D., and put in the rivet.

Finally, 400 and 600 (wet - 3rd pic) are used to continue the process--with the latter grit starting to show yourself if you've missed anything in the rougher stages. Starting to feel like you're merely 'scrubbing' the surface of the metal.

Should have this brought up to polish before the badge arrives...
 

Attachments

  • timing cover(6).jpg
    timing cover(6).jpg
    283.2 KB · Views: 8
  • timing cover(7).jpg
    timing cover(7).jpg
    251.4 KB · Views: 11
  • timing cover(8).jpg
    timing cover(8).jpg
    356.2 KB · Views: 22
Looks like there's enough of the original hole to grab a rivet--but if not, I'll just slip a toothpick in there, add some JB Weld, pull the toothpick when it starts to kick, sand it smooth the next day, drill to the right I.D., and put in the rivet.
If you are not set on using what Triumph called "Hammer-drive screws", triples secured the plate with more usual 4BA round head slotted screws (the alternator's under that cover, the plate covers a triangular hole for strobe timing).
 
If you are not set on using what Triumph called "Hammer-drive screws", triples secured the plate with more usual 4BA round head slotted screws (the alternator's under that cover, the plate covers a triangular hole for strobe timing).

Oh, cool... do you have a photo of this? It looks like the cast pillars into which the hammer-drive screws go are large enough to receive a small screw.
 
So, here are photos showing: 'before' my work, after continuing the hand-sanding up to 2000 grit, then on up to 3000 grit, after buffing and polishing compound (on the bench wheels), and a comparison of the finished product next to the kicker cover--which is next up.

These castings are a little porous, so you do reach the point of diminishing returns. I also had to make decisions about which kinds of damage to repair, and which to merely minimize or leave alone, but all in all, I think it was worth the effort--probably equivalent to a full 8-hour day per cover (two more to go!).

My fingers are tired (have to be careful I don't drop a dumbbell on my head this afternoon). Anyway, I'll have the parts in to reassemble the oil pump and reinstall the timing cover Monday or Tuesday.

Hope to meet with my machinist this coming week to get the caliper adapter made, but we'll see...
 

Attachments

  • timing cover(3).jpeg
    timing cover(3).jpeg
    249.3 KB · Views: 8
  • 2000 grit.jpg
    2000 grit.jpg
    141.6 KB · Views: 23
  • 3000 grit.jpg
    3000 grit.jpg
    314 KB · Views: 11
  • Buffed, polished.jpg
    Buffed, polished.jpg
    302.6 KB · Views: 16
  • timing cover vs. kicker cover.jpg
    timing cover vs. kicker cover.jpg
    234.6 KB · Views: 8
Last edited:
On the 750 upgrade, whenever that happens...

Is this a second breather circuit in Dave's (of the Lemon Drizzle Gang) modified 75 T140? If it is, I think Speedrattle may have mentioned how this particular style is accomplished, but I can't remember. Are there any benefits to this style versus venting through the rocker covers? It's not the best-looking setup, though I can't see it very well in this shot...

Also, I think he said that he put a T160 kicker lever on it. Is it the (apparent) added length that makes this desirable, or is it that the pivot is at the bottom rather than the top?
 

Attachments

  • Screenshot 2024-02-24 at 4.14.43 PM.jpeg
    Screenshot 2024-02-24 at 4.14.43 PM.jpeg
    255.7 KB · Views: 9
theres a couple of ways to do it

if you drill out the inside of the front cavity you can add a barb

fmAIzW3l.jpg


9Dr1pg4l.jpg


or you can add em elsewhere

t0LfNotl.jpg


some people tap the side of the timing cover. that works too
 
theres a couple of ways to do it

if you drill out the inside of the front cavity you can add a barb

fmAIzW3l.jpg


9Dr1pg4l.jpg


or you can add em elsewhere

t0LfNotl.jpg


some people tap the side of the timing cover. that works too

No problem - as you'd said earlier, I just hit 'reply' and they show up. I've downloaded them (had to do screenshots and save as jpegs) and put them in my '750cc conversion' file. Thanks!
 

Latest posts

Back
Top